VYV Network Assistant - Quick guide

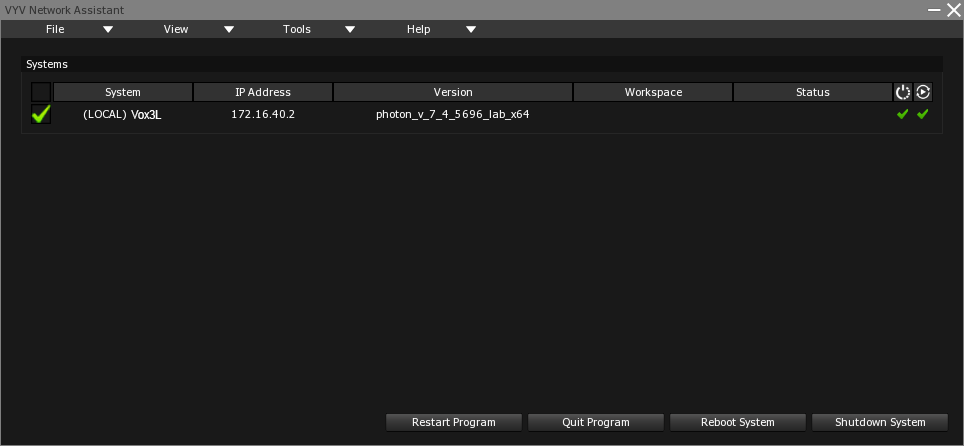
The default window of VYV network assistant present you a summary of all your systems available over the same network.
Each system must have VYV network assistant launched to be displayed in this list.
You can quickly take a look at the software version configured on each systems. Make sure that the version is the same for everyone if you want them to communicate.
If you need to update your version of Photon and you don’t have a physical access to all of your server, you can use VYV network assistant for spreading an installer over the network.
The remote installation process need to be done in two steps:
1 - Remote install
Select all of your servers by clicking on the green checkbox in front of them

Go to Tools menu > Remote Install (Shortcut: ALT + I)


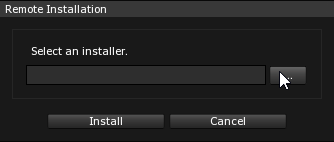
Open the Windows file explorer by clicking on the “...” and point it to your Photon installer (ex : photon_installer_v_7_5_5842_show.exe)


Once you have add the installer through the remote installation window, just click Install to start process. The main window should indicate a transfert progress and an installation progress for every servers.
2 - Configuration
The installer has been spread over the network and has been installed. Now you should specify to each server to use this new version.
Make sure that all of your servers are still checked
Go to Tools > Configure (Shortcut: ALT + C)

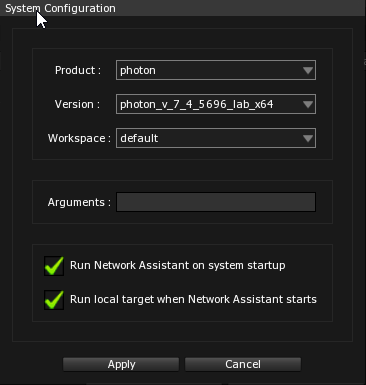
Product : Depends on what type of server you got (Photon, Xenon, Albion, Tachyon…)
Version : the different version of the software installed on the servers
Workspace : Choose between default workspace or creating a new one

Press Apply to confirm the changes.
Then reboot all of your system through VYV network assistant